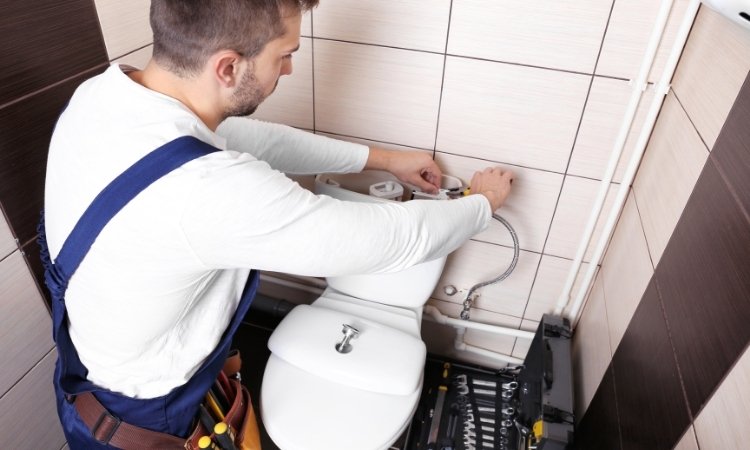
You must fix a leaking toilet cistern before it leads to bigger plumbing issues or higher water bills. In Singapore, where water conservation is taken seriously, a small toilet cistern leak can waste gallons of water each day. Fortunately, many common causes of a leaking cistern are easy to identify and repair with the right knowledge and tools.
Whether you’re a homeowner or a tenant, learning how to repair a leaking toilet cistern can save you time and money.
Understanding of Cistern is Necessary
The toilet cistern is the upper tank of your toilet that holds the water used for flushing. When you press the flush button, water flows from the cistern into the toilet bowl to clear waste. Once emptied, it refills automatically.
A leaking toilet cistern may happen for several reasons; worn-out parts, incorrect water level, or loose connections. These issues not only waste water but can also cause continuous noise or even floor damage if ignored.
Knowing how the cistern works helps you identify where the leak originates and whether you can fix it yourself or need professional plumbing help.
How to Fix Toilet Leaking Water?
To repair a leaking toilet cistern, you first need to find the source of the leak. There are a few common leak points:
- From the base: Indicates a wax ring or flange issue.
- From inside the bowl: Likely a faulty flapper.
- Overflow from the top: Fill valve or float problem.
Once you determine the location, follow the appropriate steps to fix the issue.
Tools and Materials Needed
You’ll need the following tools to fix a leaking toilet cistern effectively:
- Adjustable wrench
- Flat-head and Phillips screwdrivers
- Replacement parts (flapper, fill valve, washers)
- Towel or sponge
- Bucket
- Rubber gloves
- Plumber’s tape (optional)
- Cleaning solution (for buildup)
Most of these tools are affordable and available at hardware stores across Singapore like Selffix, Home-Fix, or Lazada.
Step-by-Step Guide to Fix a Toilet Leaking Water
1. Turn Off the Water Supply
Position the shutoff valve behind the toilet. Then turn it clockwise to stop water from entering the cistern. Now it’s time to empty the tank, and soak up any remaining water using a sponge or towel.
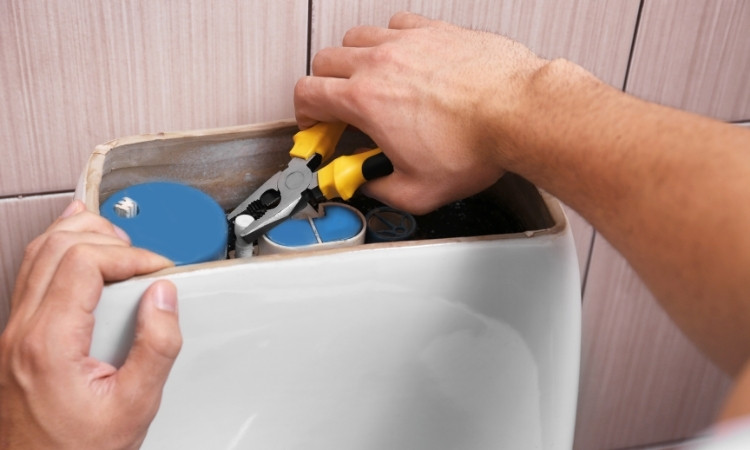
2. Inspect the Flapper
It is a rubber valve at the bottom of the cistern that opens during a flush and seals when the tank refills. If it’s damaged or warped, water continuously leaks into the bowl.
- Remove the flapper and inspect it for cracks or mineral buildup.
- Clean it with vinegar or replace it with a new one if necessary.
- Reattach it securely to the flush valve.
This is one of the most common causes of a toilet cistern leak and often the easiest fix.
3. Check the Fill Valve
The fill valve regulates the water level inside the tank. If the water keeps running or overflows, this valve may be the culprit.
- Fix the float arm to set the correct water level.
- If adjustment doesn’t work, replace the fill valve with a compatible model.
- Turn the water supply back on and check the fill behavior.
Leaking toilet cistern repair in Singapore often involves replacing the fill valve, especially in older HDB toilets where parts wear out over time due to frequent usage.
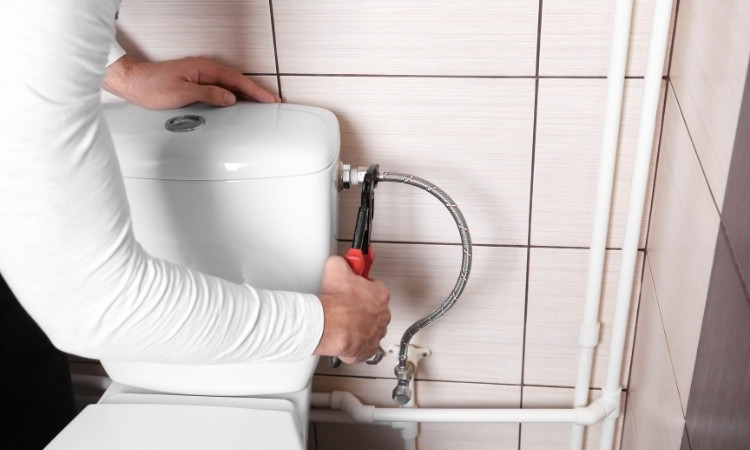
4. Examine the Wax-Ring
If you notice water stuck around the base of your toilet, the wax ring might be damaged or improperly sealed.
- Remove the toilet from the floor bolts (you may need help with this).
- Get rid of the old wax ring and replace it with a new one.
- Carefully reseat the toilet and tighten the bolts evenly.
Though this repair is more involved, it’s essential if the toilet is leaking water at the base.
5. Reassemble the Toilet
Once all repairs are made, ensure everything is reassembled properly:
- Reattach any chains, floats, or connectors.
- Close the cistern lid.
- Turn the water supply back on slowly and allow the tank to fill.
Take your time during this step to prevent any loose parts or misalignments.
6. Test for Leaks
After repairs, test the toilet by flushing several times.
- Check for any signs of water escaping into the bowl or from around the tank.
- Use a dry tissue or paper towel around fittings to detect moisture.
If there’s still a leaking toilet cistern, you may need to recheck the components or consider professional toilet repair services.
Regular Maintenance
Once you’ve fixed the problem, regular maintenance can prevent future leaks. Here are a few simple tips:
- Clean the inside of the cistern every 3–6 months to remove mineral buildup.
- Inspect the flapper and fill valve for signs of wear annually.
- Use water softeners if your area has hard water.
- Avoid using bleach tablets in the cistern—they degrade rubber parts quickly.
For those in Singapore’s humid climate, mold can also develop inside cisterns, so a monthly visual check can go a long way.
Conclusion
To fix a leaking toilet cistern, all it takes is some basic tools, patience, and a clear understanding of the components inside your toilet. From inspecting the flapper to replacing a faulty fill valve or wax ring, many common issues are easy enough for homeowners to tackle themselves.
However, if DIY isn’t your thing or if the problem persists after repairs, don’t hesitate to call a professional plumber in Singapore. A professional leaking toilet cistern repair in Singapore ensures the problem is resolved safely and efficiently.