A leaking shower isn’t just a minor discomfort; it can become a homeowner’s worst nightmare, causing frustration and possible damage to your property. However, it is not a big ask to fix a leaking shower. Resolving this issue immediately is crucial for your peace of mind and to prevent further damage to the structure of your home.
If you follow a few planned steps to fix a shower, you can do it with a DIY approach. This comprehensive guide will explain the eight effective ways to fix a leaking shower. By following these step-by-step instructions, you’ll stop the immediate leak and take preventive measures to ensure a watertight shower in the coming days.
How to Fix a Leaking Shower?
Before you fix a shower leak, it is necessary to identify the causes of leaking shower. Because you need to know the reason for the shower leak to find an optimal solution, this article begins the repair process with the identification steps. However, some fundamental things include turning off the water supply and gathering all the required tools and materials.
- Adjustable wrench
- Pipe wrench
- Plumber’s tape
- Plunger
- Plumber’s putty
- Caulking gun
- Utility knife
- Screwdriver set
- Bucket and towel
Materials required:
Replacement Parts: Depending on the issue, you may need replacement parts such as a new showerhead, faucet, or plumbing components.
Plumbing Sealant: A waterproof sealant for fixing leaks in pipes and connections.
Caulk: Waterproof caulk for sealing gaps and joints in the shower area.
Grout: If your shower leaks are relevant to damaged or deteriorating grout, you’ll need grout for repairs.
Waterproofing Membrane: Essential for preventing water penetration into walls and floors. Apply it to vulnerable areas like seams, corners, and joints.
Plunger: Used to clear minor drain blockages.
Pipe Dope or Joint Compound: For securing a watertight seal on threaded plumbing connections.
Plastic Sheets or Drop Cloths: Protect the surrounding area from dust and debris during repairs.
Gloves and Safety Glasses: For personal protection during the repair process.
Bucket and Sponge: Remove excess water and dry the work area.
Sandpaper: To smooth surfaces before applying sealants or adhesives.
Tile and Grout Cleaner: If your leaking issue is related to tiles and grout, you may need a cleaner to prepare the surface for repairs.
1. Identify the Source of the Leak
The initial step to fix a leaking shower is an exacting inspection to pinpoint the source of the issue. Leaks can occur in various areas, including the showerhead, faucet, or grout and tiles. A thorough examination of these potential problem areas will clarify where the leak originates. Using this information, you can tailor your approach to the specific issue. The repair process also depends on the type of issue you are facing.
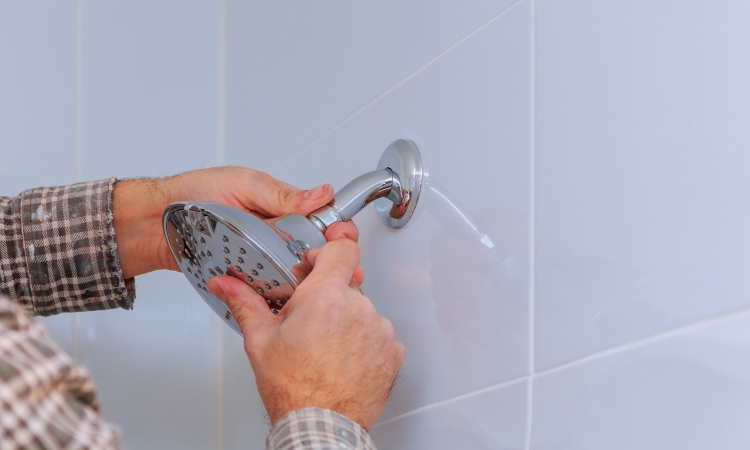
2. Inspect and Replace the Showerhead
A common reason for shower leaks is a malfunctioning or deteriorating showerhead. Check for visible signs such as cracks, loose connections, or mineral deposits affecting water flow. If you identify any such issue, replacing the showerhead with a high-quality alternative can make an immense change in stopping the leak and enhancing the overall shower experience.
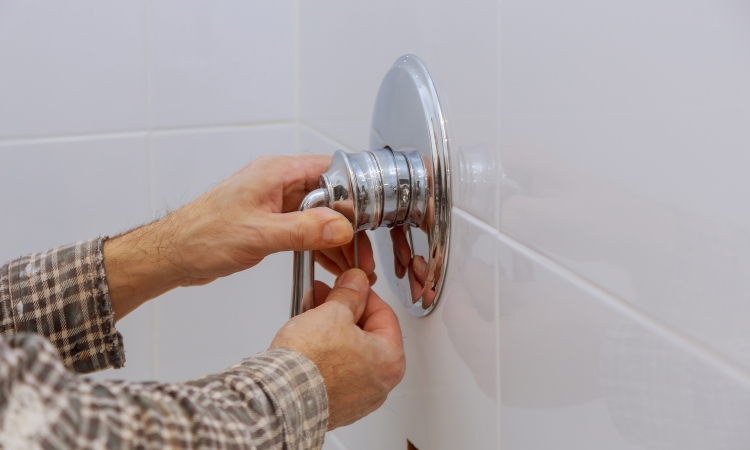
3. Fixing Faucet Leaks
While you are ready to fix a shower leak, check the faucets. Faucet leaks can contribute significantly to shower leakage. Inspect the faucet closely for any visible leaks or persistent drips.
Securing loose connections and replacing worn-out components like O-rings or washers may eliminate the issue. However, in continued problems, using a new faucet can provide a more lasting and effective solution.
4. Repairing Grout and Tiles
Leakage through damaged grout or tiles is another typical issue in showers. A complete inspection of the shower walls and floor is pivotal to identifying any cracks or gaps.
Once identified, removing and replacing damaged grout is crucial, ensuring a watertight seal. If tiles are the cause of the leaking shower, replacing cracked or loose tiles and resealing surrounding grout becomes the key to prevent water seepage.
5. Sealing Leaky Pipes
Hidden leaks behind the shower wall may come from damaged or leaky pipes. If you suspect plumbing issues, inspect the pipes for visible signs of leakage. Use plumbing sealant or tape to fix minor leaks.
For more significant plumbing problems, consult leaking shower repair services in Singapore. Because professionals can accurately diagnose and resolve complex issues hidden within the structure of your home.

6. Waterproofing the Shower Area
Improving the shower’s waterproofing is a proactive measure to prevent future leaks. Applying a high-quality waterproofing layer, focusing on prone-to-leak areas such as seams, corners, and joints, adds an extra layer of protection.
This measure safeguards against water penetration, resolving potential leaks before they become a more significant concern. Choosing a membrane that suits your shower design and material is essential, ensuring a comprehensive and long-lasting solution.
7. Regular Maintenance Tips
The successful resolution of a leaking shower is not the end of the story. Adopting routine maintenance practices is essential to ensure the longevity of your fixes. Regularly check for signs of wear and tear, clean the showerhead and faucets to avoid mineral build-up, and inspect the grout and tiles for any potential issues.
Timely addressing minor issues during routine checks will stop them from increasing into more significant and costlier problems.
8. Preventive Measures and Future Considerations
While the abovementioned steps effectively resolve leaks, implementing preventive measures can further secure your shower against future issues. Consider installing a drip pan under the shower to collect and divert water away from the structure.
Furthermore, use high-quality fixtures and materials for your shower to reduce the probability of future leaks. Periodically check for and repair any minor issues before they escalate, remaining proactive toward your shower’s health.
Conclusion
In conclusion, homeowners should adopt a systematic approach to fix a leaking shower. Addressing targeted areas such as the showerhead, faucet, grout, tiles, pipes, and overall waterproofing is crucial in the repair process. Identifying the source of the leak and applying the appropriate fixes will help you resolve the immediate issue and safeguard your home from potential water damage. Regular maintenance is the key to prolonging the impact of these fixes, ensuring a leak-free and functional shower for years to come.